Wednesday, November 26, 2014

Quilled Thanksgiving Turkey Placecard Instructions

Happy Thanksgiving to my American homies! In honor of the occasion, I'm posting photos of the placecards I made for my Thanksgiving dinner this year. My guests will be from Germany, Australia and Spain. I'll actually serve my dinner on Saturday, November 29 because I live in Germany and we all have to work on Thursday. I can't wait to introduce them to the American Thanksgiving feast!

Here is a shot of all the placecards:

Here are the details about how to make the turkeys:
Feathers (make five):
4" yellow
8" dark brown
8" deep red
8" orange
Glue colors together in the order listed. Make five large teardrops, with two of the teardrops slightly smaller than the other three. The smaller teardrops are the bottom feathers.

Body:
24" dark brown
Press the coil into a modified half-circle with rounded "points" protruding slightly.

Legs:
3/4" yellow
Fold into feet

Head:
12" light brown
Coil and press into head shape. It will look somewhat like a fish!

Beak:
1.5" yellow
Coil and press into triangle.

Wattle:
2" red
Make a teardrop.

Assemble the birds as shown. I varied the position of the feet and heads to give each its own personality.

And here's a shot of the back of the cards. I went primitive and drew stick pilgrims (pilgrim boy for the men and pilgrim girl for the women) along with a different happy affirmation for each:

Labels: , , , , , , , ,

Wednesday, September 24, 2014

Quilled Edelweiss Flowers for Oktoberfest

This item I quilled for a friend who gave me her precious quilling paper because I was leaving for Germany where I can't find so much of it. Again, I used the things around me for inspiration. This time it was the Edelweiss flower so common in jewelry and decor surrounding Oktoberfest this time of year. I made the leaves of the fern-like stems at the bottom of the arrangement using the teeth of a comb.


Labels: , , , , , , , ,

Wednesday, September 17, 2014

Quilled wheat and poppies

Lately I've been making quilling pieces based on things I see around me here in the Munich, Germany area. One thing I've noted is the beauty of the bright red poppies that grow on the edges of wheat fields. Using a technique from Kativilaga to make the wheat strands, here's what I turned out for a friend who sends me "care" packages from the States:

Labels: , , , , , , ,

Wednesday, September 10, 2014

Quilled Octoberfest Cookies

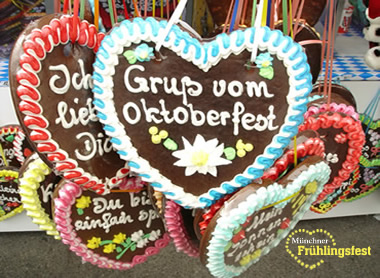
It's nearing Oktoberfest here in Munich, and the Lederhosen and Dirndl (traditional women's costume) are proliferating. In addition, you can see giant gingerbread cookies decorated with festive colors and sweet phrases. These cookies are souvenirs and gifts; they aren't meant to be eaten. The cookies are very hard and the icing really doesn't taste very good. Here's an example of a display you might see at Oktoberfest (photo not mine):
 Oktoberfest Herzen
What does that have to do with my quilling? Well, in keeping with my latest efforts to find inspiration from things around me for my quilling, I came up with the idea of quilling some of these cookies. They, too, make great gifts and I am working on a "cookie" for each of my friends here.

Here are my efforts so far:
The cookies in the first photo are about 12 inches wide; mine are about four inches. These would make wonderful placecards at an Oktoberfest-themed party or tags for wrapped gifts.

I am thrilled that my quilled facsimiles came together so well. I'm really enjoying designing my own creations these days instead of following a pattern.


Labels: , , , , , , , ,

Wednesday, September 3, 2014

3D Quilled Cake and Coffee Card

Here is a birthday card I recently quilled for a dear friend in Germany. Hilde's passion and talent is baking cakes and tortes. Because she is old-school German, she serves up her delicious goodies to friends and family at the traditional coffee hour, 3 or 4pm.

Since she has always thought about opening a cafe, I made her one:
 Here's a couple of closeups of the items in the card:

Enjoy!

Labels: , , , , , , ,

Wednesday, June 18, 2014

How to Fold a Paper Kusudama Ball Tutorial


A kusudama ball is a paper ball made from individual origami flowers. They are quite beautiful. Here's what my completed one looks like (ok, it's only half of the ball, but you get the idea):

I used several copies of an outdated flyer for some concert I'd picked up downtown to make it, but it works great with origami paper, too.

The kusudama ball is especially pretty if you use paper with different colors on each side. The inside of the flowers will be a different color than the outside.

Here are the instructions:

Materials:
60 squares of origami paper or other paper, any size (I used 3"x3")
glue

Step 1:
Put a paper square on a table in front of you so it looks like a diamond shape. Fold the bottom corner to the top and crease the fold to form a triangle with the long side at the bottom.


Step 2:
Fold both the left and right corners to the top and crease. Now you have a diamond shape bisected by the line where the two side flaps meet in the middle.


Step 3:
Fold the two flaps down again, aligning the edges that were in the middle in Step 2 with the bottom edges of the diamond. Crease well. Now you have a shape that looks somewhat like a fleur-de-lis with a point in the middle and two wings on the sides.


Step 4:
Stand the flaps up so they're perpendicular to the table. Open the flaps and press down on the center creases, which now line up with the right edge of the diamond from Step 1. When you press these creases down, they naturally indicate where the flaps can be flattened. Now your fleur-de-lis shape has wider wings with a crease slanting down the middle of each wing.

Step 5:

Fold the top of each wing toward the bottom, forming a small triangle. The edges of the triangle line up with the edges of the original diamond shape from Step 1.

Step 6:
Fold the bottom of the flaps toward the middle along the creases, folding them in half. The triangles formed in Step 5 are now inside these flaps. Now you have a diamond shape with two side flaps folded toward the middle.


Step 7:
Curve the paper around and glue the surfaces of the two flaps together inside. Now you have a 3D oval which is one petal of a paper flower. Inside, the flaps form three pistils/stamens. If you are using paper with different colors on each side, make sure the color you want on the inside of the flowers ends up on the inside of the petal.

Step 8:
Repeat Steps 1-7 for each square of paper to make 60 petals.

Step 9:
Glue six petals together in a circle to make one flower. The pistils/stamens now radiate from the middle. Glue the rest of the petals together in groups of six to make 12 flowers total.


Step 10:
Now put glue in a line all the way down the the outside of two petals of one flower. Press two petals of a second flower to the glued petals to begin making the kusudama ball. Continue adding flowers and gluing the petals that touch other flowers until you use six flowers. Now you have half a sphere. Repeat with the other six flowers to create the other half of the sphere.

Step 11:
Glue the two halves together by placing glue on the petals that will touch other petals to create the whole kusudama ball. You're done!

I found that the half-balls are better suited to staying in place if you want to set the kusudama ball on a shelf. If you want to hang them or perch them atop a vase, a whole ball is better.

Leave me a comment if you try this and let me know how it turns out. Have fun!

Labels: , , , ,

Tuesday, May 13, 2014

Quilled Wall Hanging

Wall hanging I made for a friend to go with her brown- and gold-tone peacock

Labels: , , , , ,